Community
  1. Community
  2. Mako Shark 2
  3. Mako/Maco Replicas
  4. Work is progressing on the Silva Maco

Work is progressing on the Silva Maco

Started by Firefingers · Sun 2009-05-10 (17 years ago) · in Mako/Maco Replicas

555views
Sun 2009-05-10 (17 years ago) · edited by Firefingers

I figured I'd give everyone a heads-up on the progress of my Maco. I have removed the fugly quad rectangular headlamps and semi-restored the original body lines in front. I found a super-trick fully-self-contained sealed beam lighting system that fits the opening beautifully and has two round headlamps along with a turn signal. They are going to look oustanding and really simplify the headlamp dilemma, while providing state-of-the-art projection lighting.

After screwing with the "factory" hood hinges, I'm not satisfied with the best-case results and flimsy operation. I've removed the front end, and am going to fab a needle-bearing pivot with a damping rod to assist, using the factory latches still.

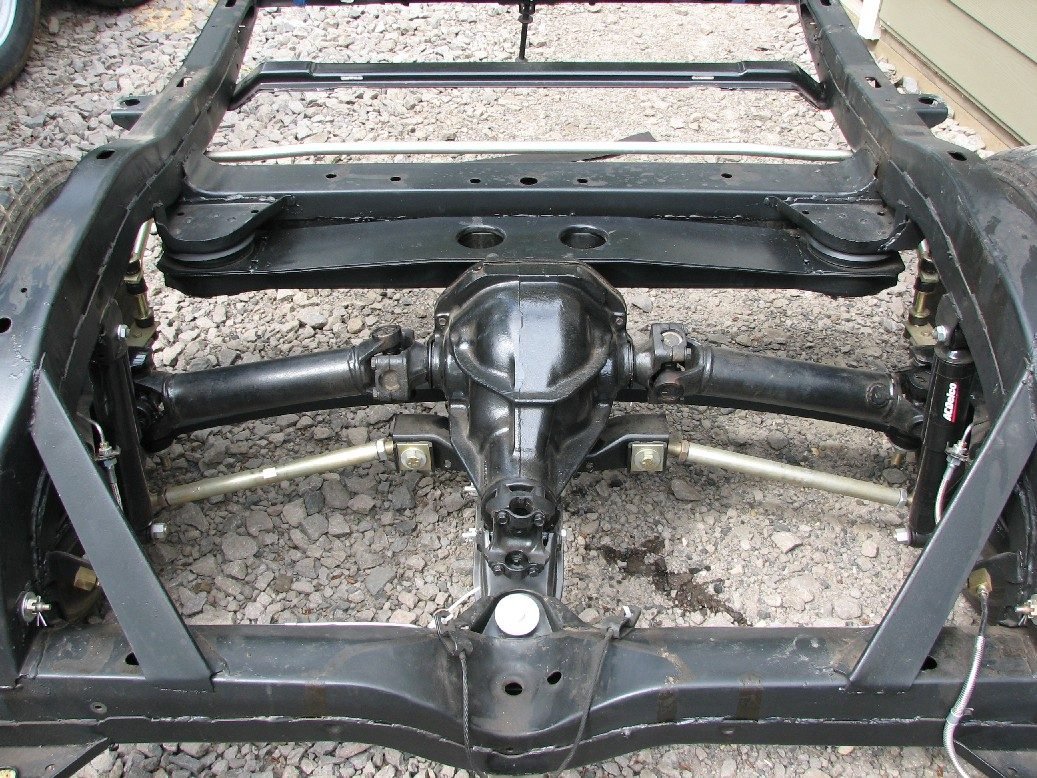
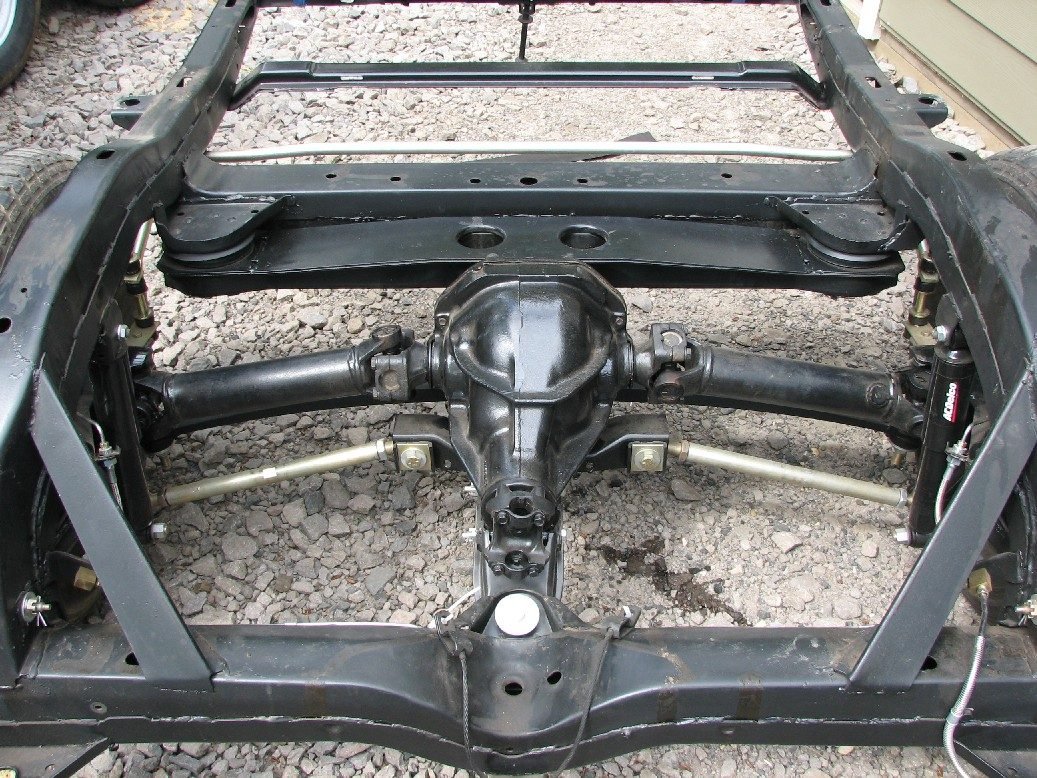
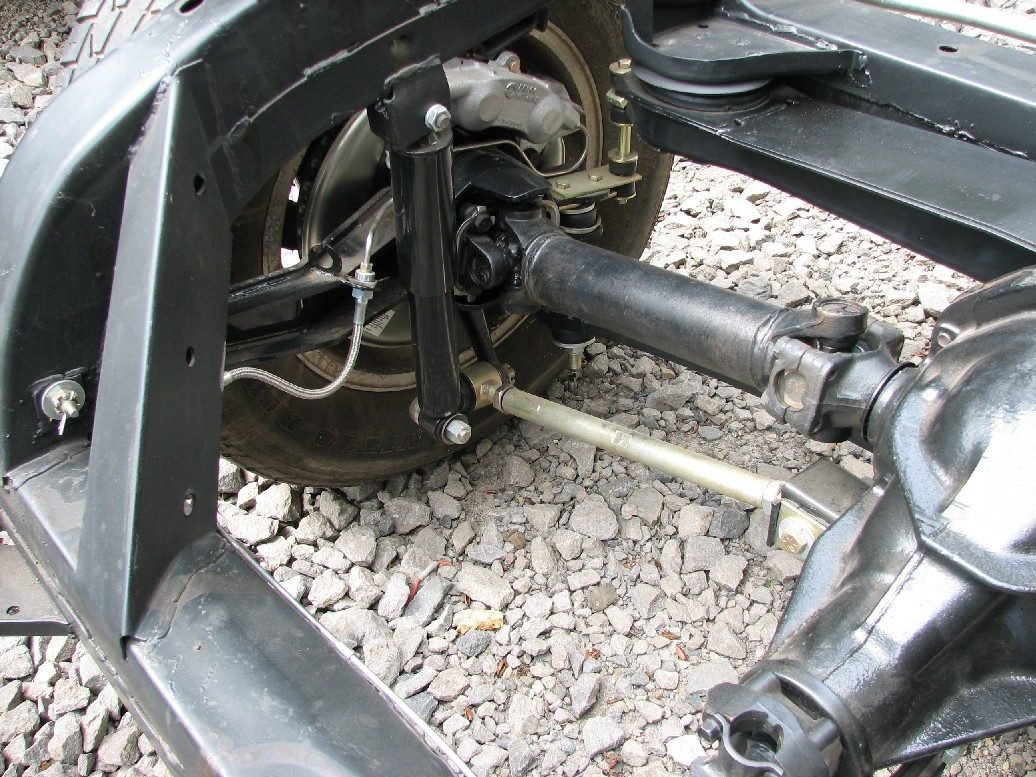
I've removed the body from the frame, and have completely restored the chassis... sand-blasted, epoxy primed, and painted the frame, rebuilt and restored the rear end, installed off-set trailing arms and an L-88 rear spoiler, along with a one-piece fiberglass autocross spring with adjustable links. Replaced each and every bushing, nut, and bolt from fore to aft. Front suspension completely rebuilt including trick billet coil-over adjustible shocks that replace the spring assembly. New HD front sway bar, new hydraulic ram, rebuilt steering gear, brakes completely redone at all four corners, new fuel line, new brake lines, new parking brake lines. Trick aluminum 4-row radiator with twin fans is replacing the stock unit.

I bought a set of Hooker 4-into-1 polished stainless-steel side exhaust; it is beautiful. Pulled the '68 327 that was in the car, bought a '71 high-nickel 4-bolt block and built a 400 ci small-block with 8-to-1 dished pistons, factory rods with ARP bolts, and a steel crank. Fully balanced assembly. Bolted on a pair of World Products Sportsman II heads. Bought a nice polished BDS 6-71 blower and 8mm drive... need to select the right cam for the combination, and get an intake manifold. This is going to be an awesome setup; the pre-requisite massive supercharger poking out of the Maco tilt front end, polished thunderous side exhaust, attack stance... Does it get any better?!

Bought one front bumper... I understand that I need TWO to enlongate and fab one Maco front bumper... it's a start. Landed on "the" wheels for the car, but I'll save that selection for the pictures later... I think they will meet with Forum approval.

So... working on getting the front end/headlamp/grille area "right", then on to body and paint. I'm hoping to have the car on the road in 90 days or less... a guy has to have a goal!

Pictures to follow shortly!

Bro' FF

Report

It goes to the site's admin with a copy of the post. The post stays up.

Sun 2009-05-10 (17 years ago)

Man................... you're really getting me pumped !

I wanna see some pix.............. please !!!

Sounds really awesome, I'm working on the reassembly of mine, but realistically can't see getting it finished for another year. They say good things take time.............. LOL. Actually, I'm just slow doing everything myself, but I don't want to get ahead of myself and rush things..........been there before !

I really want to see some shots of your headlight system......... sounds killer !!! Rick

Report

It goes to the site's admin with a copy of the post. The post stays up.

Mon 2009-05-11 (17 years ago)

Some pictures of the chassis as semi-completed:

Picture posted by Firefingers

Picture posted by Firefingers

Picture posted by Firefingers

Picture posted by Firefingers

Picture posted by Firefingers

Bro' FF

Report

It goes to the site's admin with a copy of the post. The post stays up.

Mon 2009-05-11 (17 years ago)

Looks great.................... that is one clean looking chassis !

You better turn your trailing arm bolts around.......... once the body is back on, you won't be able to get to the nut and cotter pin hidden inside the frame ! Keep up the good work ! Rick

Report

It goes to the site's admin with a copy of the post. The post stays up.

Tue 2009-05-12 (17 years ago)

Looks like your doing this one right. there is just so much you cant get to without pulling the body off. Plus it is so much easier to work on. Keep up the good work. Wayne

rockcrusher67

Report

It goes to the site's admin with a copy of the post. The post stays up.

Tue 2009-05-12 (17 years ago)

Thanks guys, I appreciate the input and encouragement.

I added power steering, but I'm definately missing a bracket or two that ties the ram into the frame... does anyone have a picture to show me what I need?

Bro' FF

Report

It goes to the site's admin with a copy of the post. The post stays up.

Fri 2009-05-22 (17 years ago)

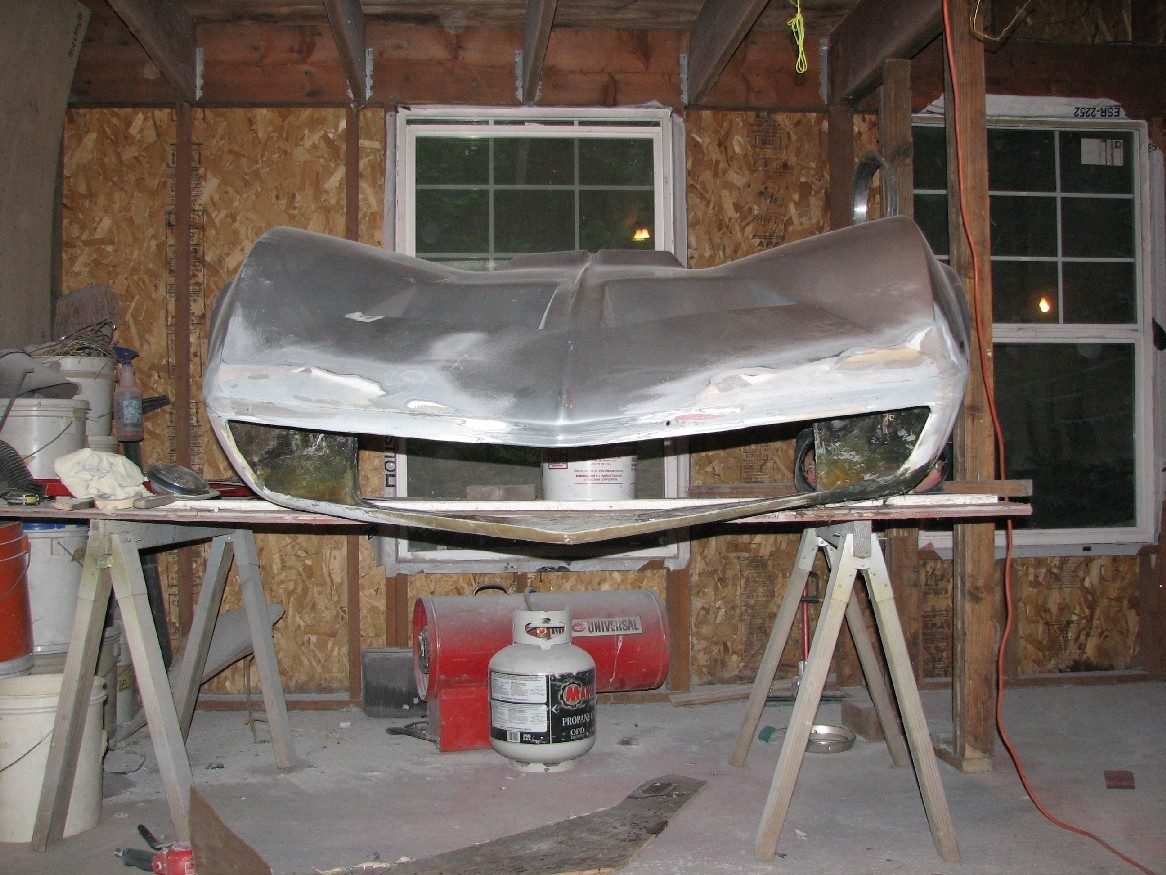
Fiberglass update/nose job

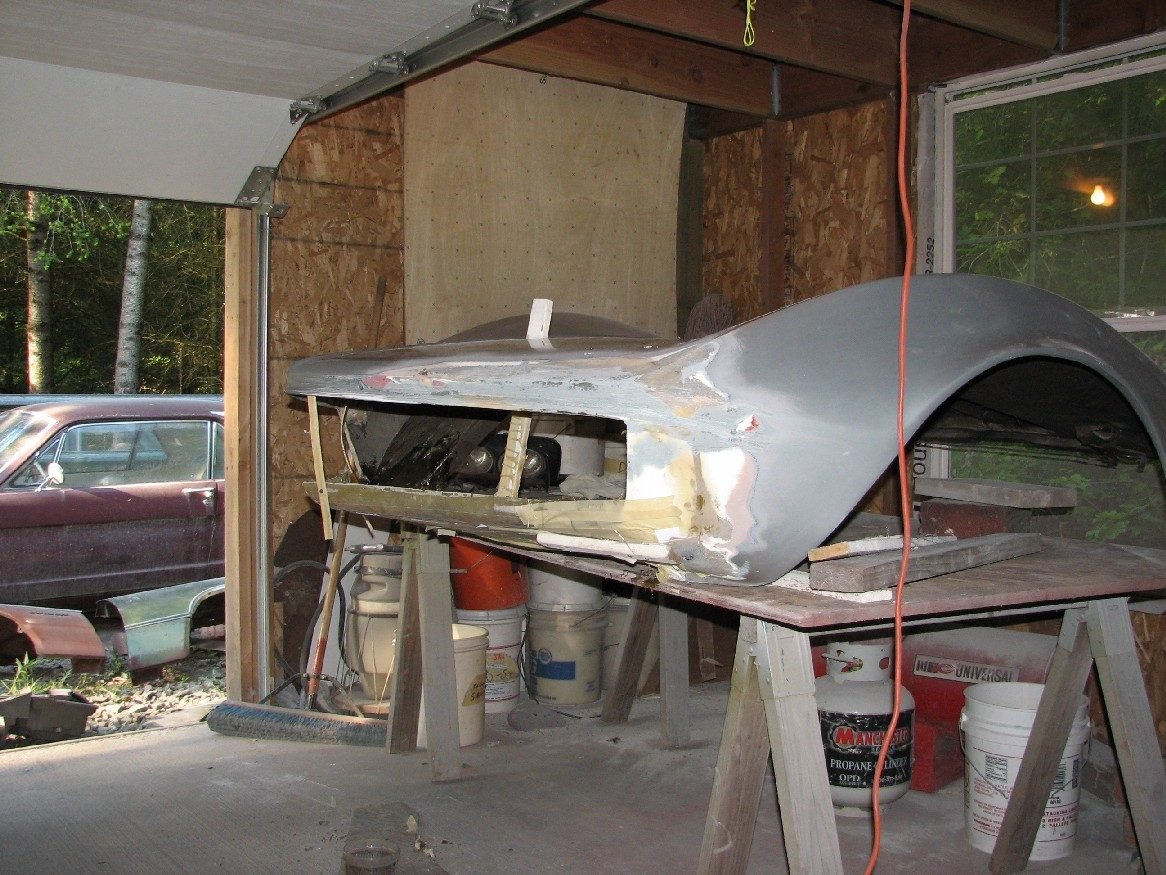
Been working on the nose now for about three weeks off and on... remember the butt-ugly rectangular headlamps that stuck out past the front of the car and ruined the body lines?

Here are some progress photos:

Picture posted by Firefingers

Picture posted by Firefingers

Picture posted by Firefingers

Picture posted by Firefingers

Picture posted by Firefingers

Picture posted by Firefingers

Bro' FF

Report

It goes to the site's admin with a copy of the post. The post stays up.

Fri 2009-05-22 (17 years ago) · edited by Firefingers

Fiberglass update/nose job

After cutting off the old crap headlights, I removed the body from the frame, and brought the nose around back and placed it on a workbench for re-shaping. I cut the entire lower valaence off. Using a piece of 3/8" plywood, I cut a template to establish the ovearall "footprint" shape of the new valence. I then used sections of cardboard tubing stock (like the thick rolls in the center of carpet rolls, or sonatube concrete forms) to establish a rolled leading edge. Fab'd the valence out of mat/resin/cloth, trimmed it, and then 'glassed it into place. I filled in the old parking lamp/turn signal areas that were in the bumper line/leading edge as well. I'll obviously have to trim the opening to get it the correct height, and get it looking "just right." I figure the rough glass work will be done in two more days, then on to molding in the mounts for the headlamps, followed by some reinforcement tying the upper and lower hood sections together so I don't get cracking in the future.

Fun stuff!

Bro' FF

Report

It goes to the site's admin with a copy of the post. The post stays up.

Wed 2009-05-27 (17 years ago)

Fiberglass update/nose job

More progress as of 5-27.... lower valence trimmed to approximately the correct opening/dimensions, leading edge of the nose almost completely re-shaped. Working on mounting the headlamp bezels into position.

Picture posted by Firefingers

Picture posted by Firefingers

Picture posted by Firefingers

Picture posted by Firefingers

Bro' FF

Report

It goes to the site's admin with a copy of the post. The post stays up.

Thu 2009-05-28 (17 years ago)

Fiberglass update/nose job

Keep on pluggin' looks great!

"Randy"

Report

It goes to the site's admin with a copy of the post. The post stays up.

Thu 2009-05-28 (17 years ago)

Fiberglass update/nose job

this is fascinating to watch evolve

I always wonder why these didn't have some type of grill(s) for the 2 leading coves like the original

(-I'm struggling with images at this forum)

Report

It goes to the site's admin with a copy of the post. The post stays up.

Sun 2009-05-31 (17 years ago)

Fiberglass update/nose job

pbcanney

You can always add them in, they are billet grill.

McBrain

McBrain
Friendly Neighborhood Ninja

And Maco Lovers we shall be, for Chevy my Vette for thee.
Power hath decended forth from thy Foot so our tires may
swiftly

Report

It goes to the site's admin with a copy of the post. The post stays up.

Tue 2009-06-09 (17 years ago)

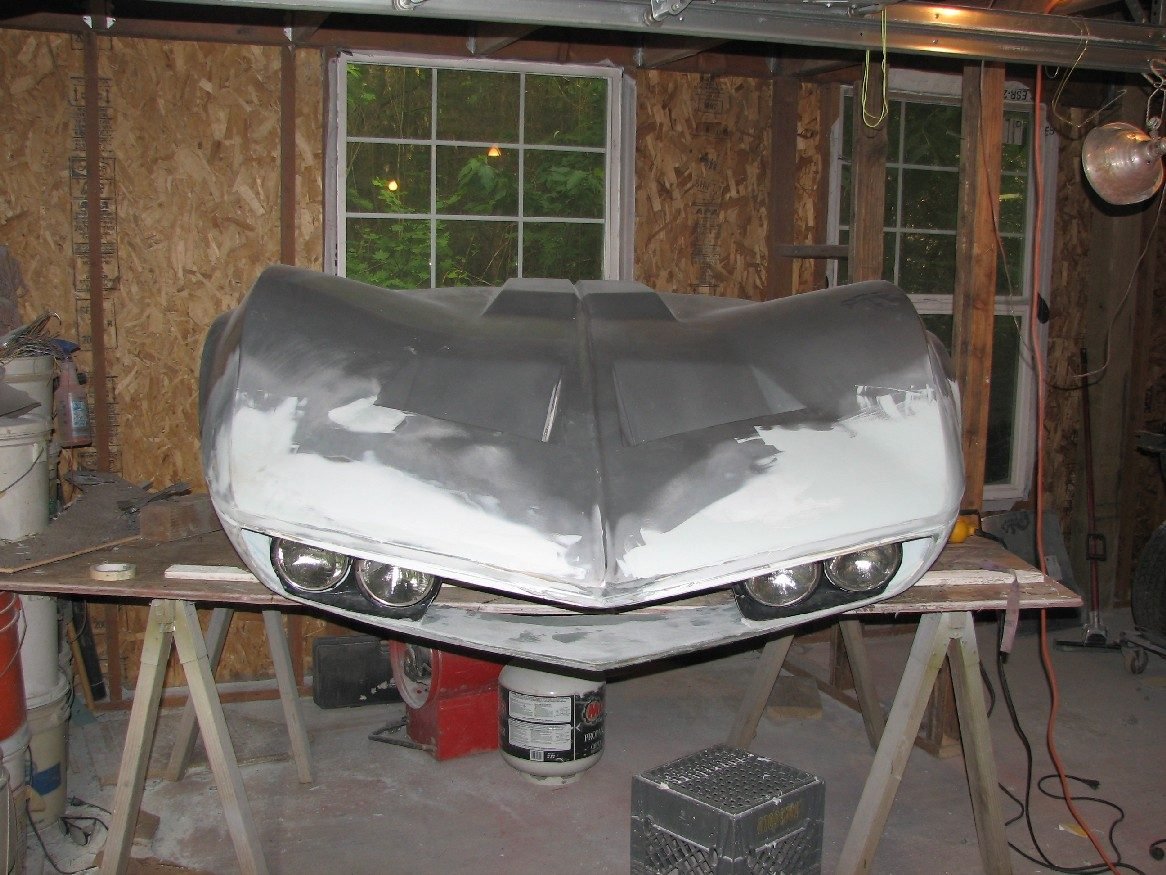
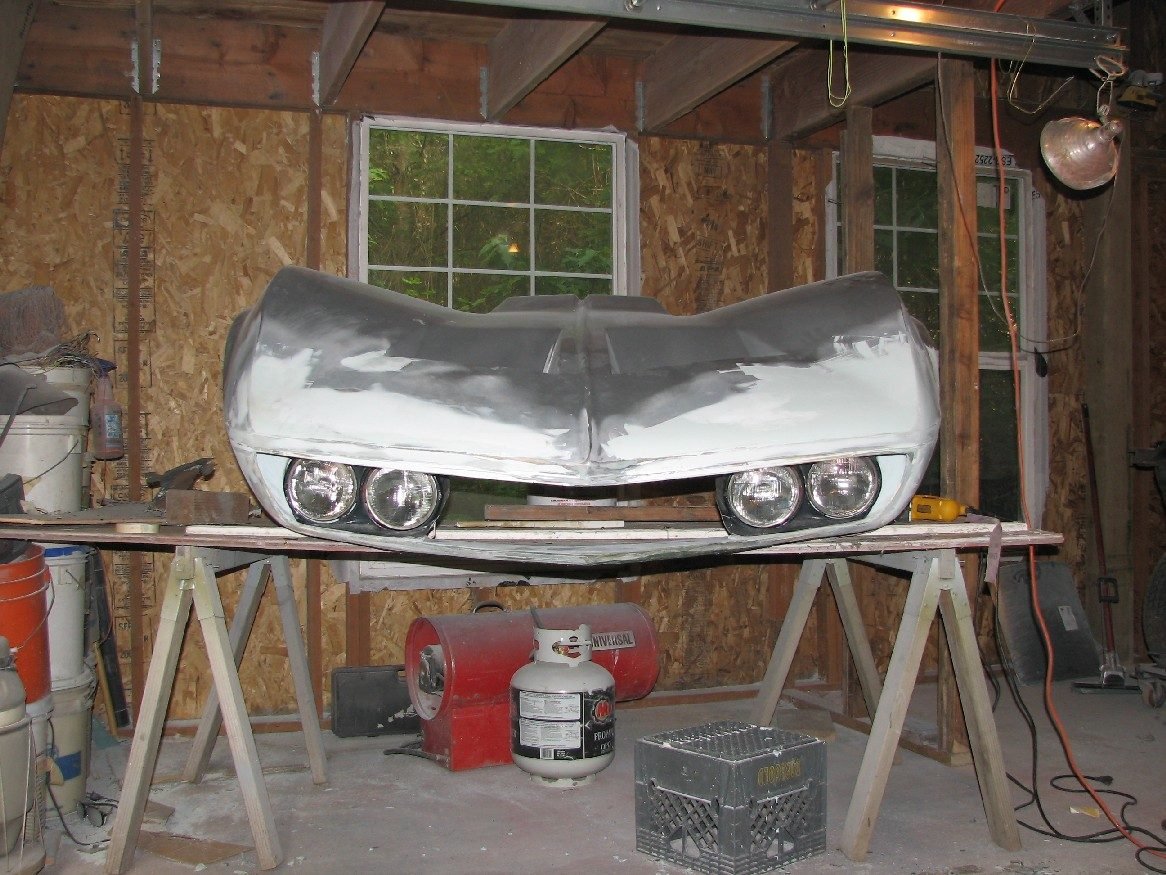
Front end update/headlamps roughed in!

I had mentioned earlier that I found a trick set of projector halo/angel eye headlamps that fit the Maco well... they were from a BMW Z3 roadster. While they looked "just right" shape-wise, they were just too modern-looking for the overall feel of the car, in my opinion.

So... I went a different direction, and am glad I did. I got a pair of '71 stock pop-up headlamps, cut about half the back off them (lid, housing), and trimmed the bezel to follow the shape of the bulbs. Then, I fab'd a small "bulkhead" inside the right and left sides of the grill opening respectively, and 'glassed them in about 3" back from the opening. These match the outer contours of the headlamp bezels, filling in the side gaps. I will also use these to mount '69/69 parking lamps as well. I then built brackets to mount the headlamp assemblies, and fastened them today.

So, the nose has taken shape, lower valence and grill opening dialed in, and headlamps roughed in. I'll mould them in from the rear so the housings are "built-in", while the bezels are removable from the front to facilitate headlamp replacement.

Here are a couple of progress pictures; one from the perspective an observer standing up looking at the car, and another from the "head on" perspective of an observer down on the ground. Hope you like it!

She's getting there! ~Tim

Picture posted by Firefingers

Picture posted by Firefingers

Bro' FF

Report

It goes to the site's admin with a copy of the post. The post stays up.

Mon 2009-06-15 (17 years ago)

6-15-2009 Update

Close-ups of the headlamp bezel filler panels getting close to finished, headlamp bezels with sides roughed in, bezel "platforms" roughed in, and overall shot of nose with all the above in progress:

Picture posted by Firefingers

Picture posted by Firefingers

Picture posted by Firefingers

Picture posted by Firefingers

Bro' FF

Report

It goes to the site's admin with a copy of the post. The post stays up.

Tue 2009-06-16 (17 years ago)

6-15-2009 Update

Looking a whole lot better. Wayne

rockcrusher67

Report

It goes to the site's admin with a copy of the post. The post stays up.

Tue 2009-06-16 (17 years ago)

6-15-2009 Update

That shark has eyes. Looking good .when I go back to the before picture and then to present it doesnt even look like the same car.

Fathom 427

Report

It goes to the site's admin with a copy of the post. The post stays up.

Tue 2009-06-16 (17 years ago)

6-15-2009 Update

Thanks guys. I appreciate the encouragement; it's fun at times and trying at others... lots of reworking and reworking again even after I think I have it "just right."

I modified an original '71 front bumper to fit the nose, and now I can see that there's just a bit of a convex curve to the upper inside edge of a C3 hard chrome bumper... I had used a straight-edge to form the leading edge of the nose, and now I have to slighly modify it to match the contour of the bumper for a "factory fit." Lots of little things like that... after I make my grille, I'll have to do some modification again in the opening for mounting, etc. Seems to never end, but with some regular noticable progress, and a bit of encouragement from y'all, I'm still in the game!

A little itchy, but still in the game.

Bro' FF

Report

It goes to the site's admin with a copy of the post. The post stays up.

Wed 2009-06-17 (17 years ago)

6-15-2009 Update

what a sharp job!

Gabriele "Attila" Morasso

Report

It goes to the site's admin with a copy of the post. The post stays up.

Thu 2009-06-18 (17 years ago) · edited by Firefingers

Headlamp bezel detail

Here's a close-up of the headlamp bezel as of tonight... I squared off the inside edge of both, running them parallel with the centerline of the car. I added some material to the leading edge to give it a streamlined, built-in look.

Picture posted by Firefingers

Bro' FF

Report

It goes to the site's admin with a copy of the post. The post stays up.

Wed 2009-06-24 (17 years ago)

6-24 progress with bumper in place

I modified a stock bumper by sectioning a small piece from the front apex to make the angle more acute, and opened up both ends to get them to wrap around the body... was able to make one bumper work with a little fill-in welding. Obviously it will be rechromed.

Extened the nose about 3/8" to match the contour of the bumper.

Headlamp bezels, filler panels, lower valence, etc. almost completely dialed... getting close. ~Tim

Picture posted by Firefingers

Picture posted by Firefingers

Picture posted by Firefingers

Bro' FF

Report

It goes to the site's admin with a copy of the post. The post stays up.

Sign in to reply.

Delete?